
Engraving on Small Metal Surface
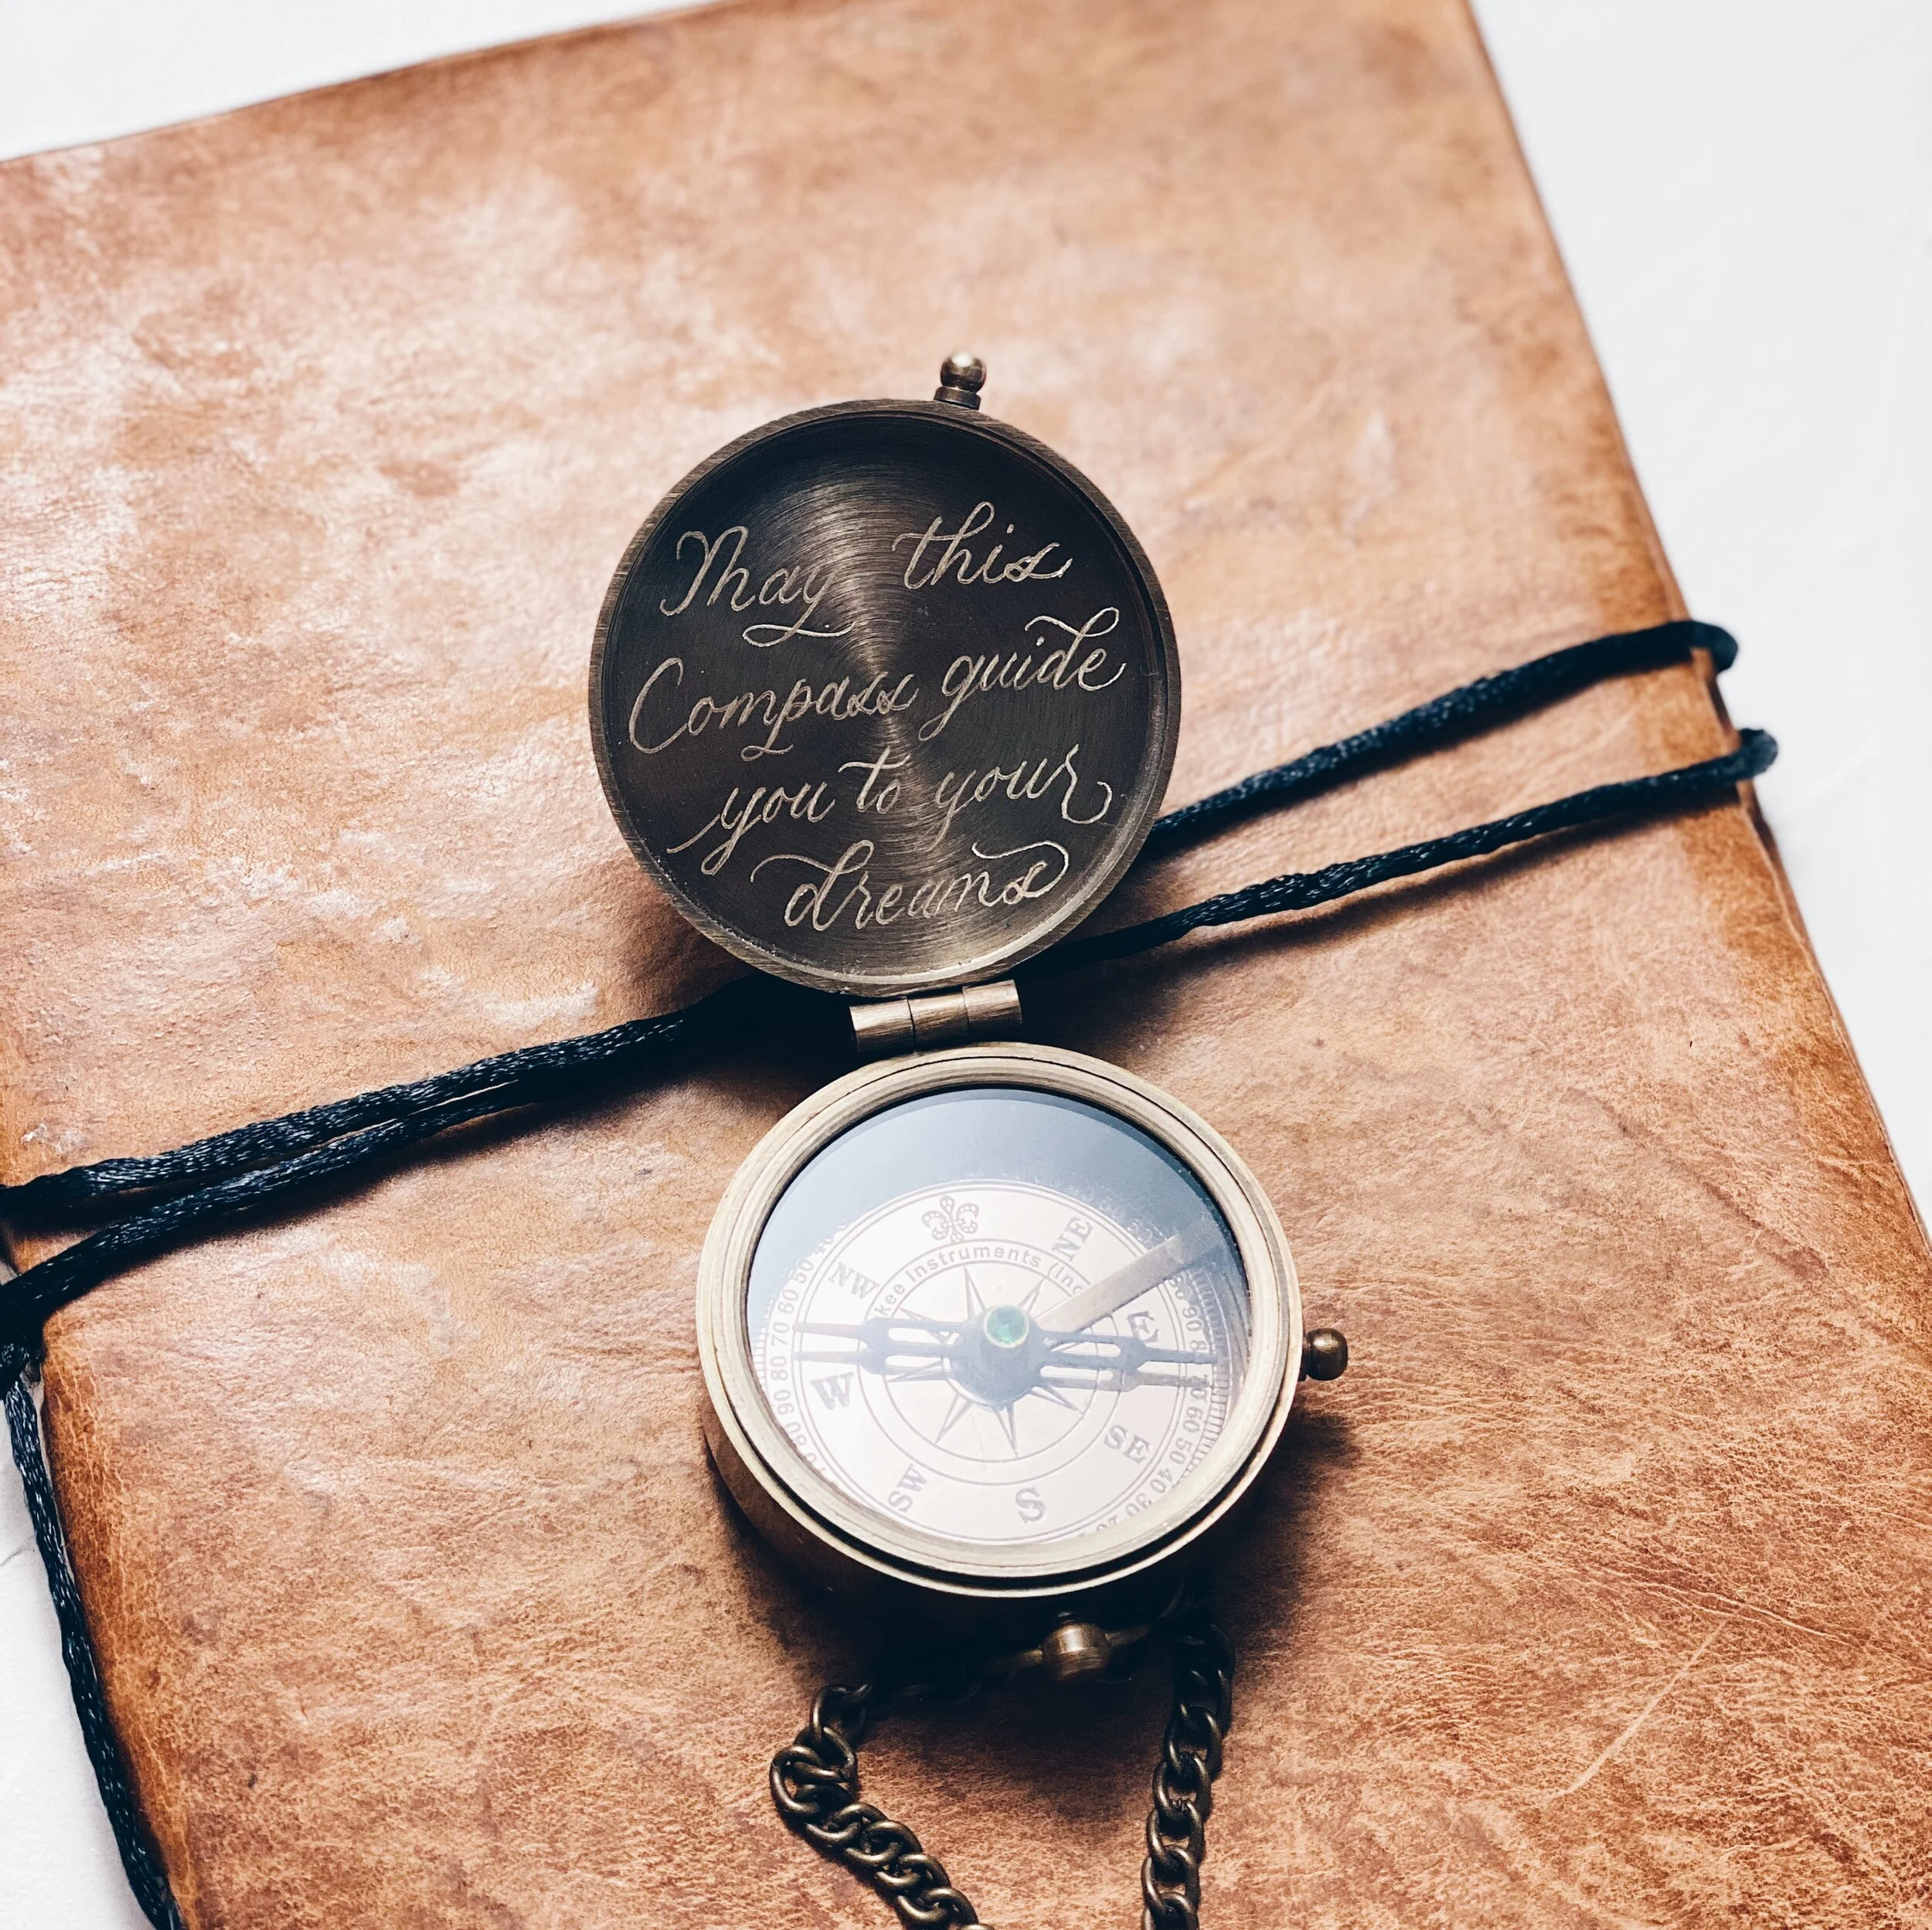
/My first engraving live event was to engrave 140 watches in 2.5 hours. During this time, I was taking metal notes (I mean mental notes…see what I did there?) about a thing or two when it comes to metal engraving. The more I do live engraving events, the more variety of metals that I have come across. Some are coated. Some are fake metal that’s actually plastic. Some are easier than others to engrave. I was recently commissioned for a very sentimental engraving project on a small compass which required a very meticulous process.
This project came with a number of challenges:
It’s a small surface
Client wanted a quote on the small surface
It’s for a baptism gift so that’s very high in sentimental value
There is only 1 compass, which means there is no room for mistake
I decided to document my process so I can share with you.
The Tools
For this project I used the following tools:
Pencil: To sketch your design on paper. I used Sakura 0.5 mechanical pencil. It’s easier to sketch when it’s a fine point.
Paper: I used dotted Rhodia sketch book to layout my design but you can use any paper.
Eraser: It’s pretty straightforward. We need eraser to erase because we all draft and nobody comes up with a design on the first try.
Fine point pen: I used Micron 01 to draw my design on the surface (the compass)
Ruler: to measure the diameter of the engraving surface. I used Westcott Beveled ruler.
Drawing compass: because the surface is round, I used drawing compass to draw the circular space I have.
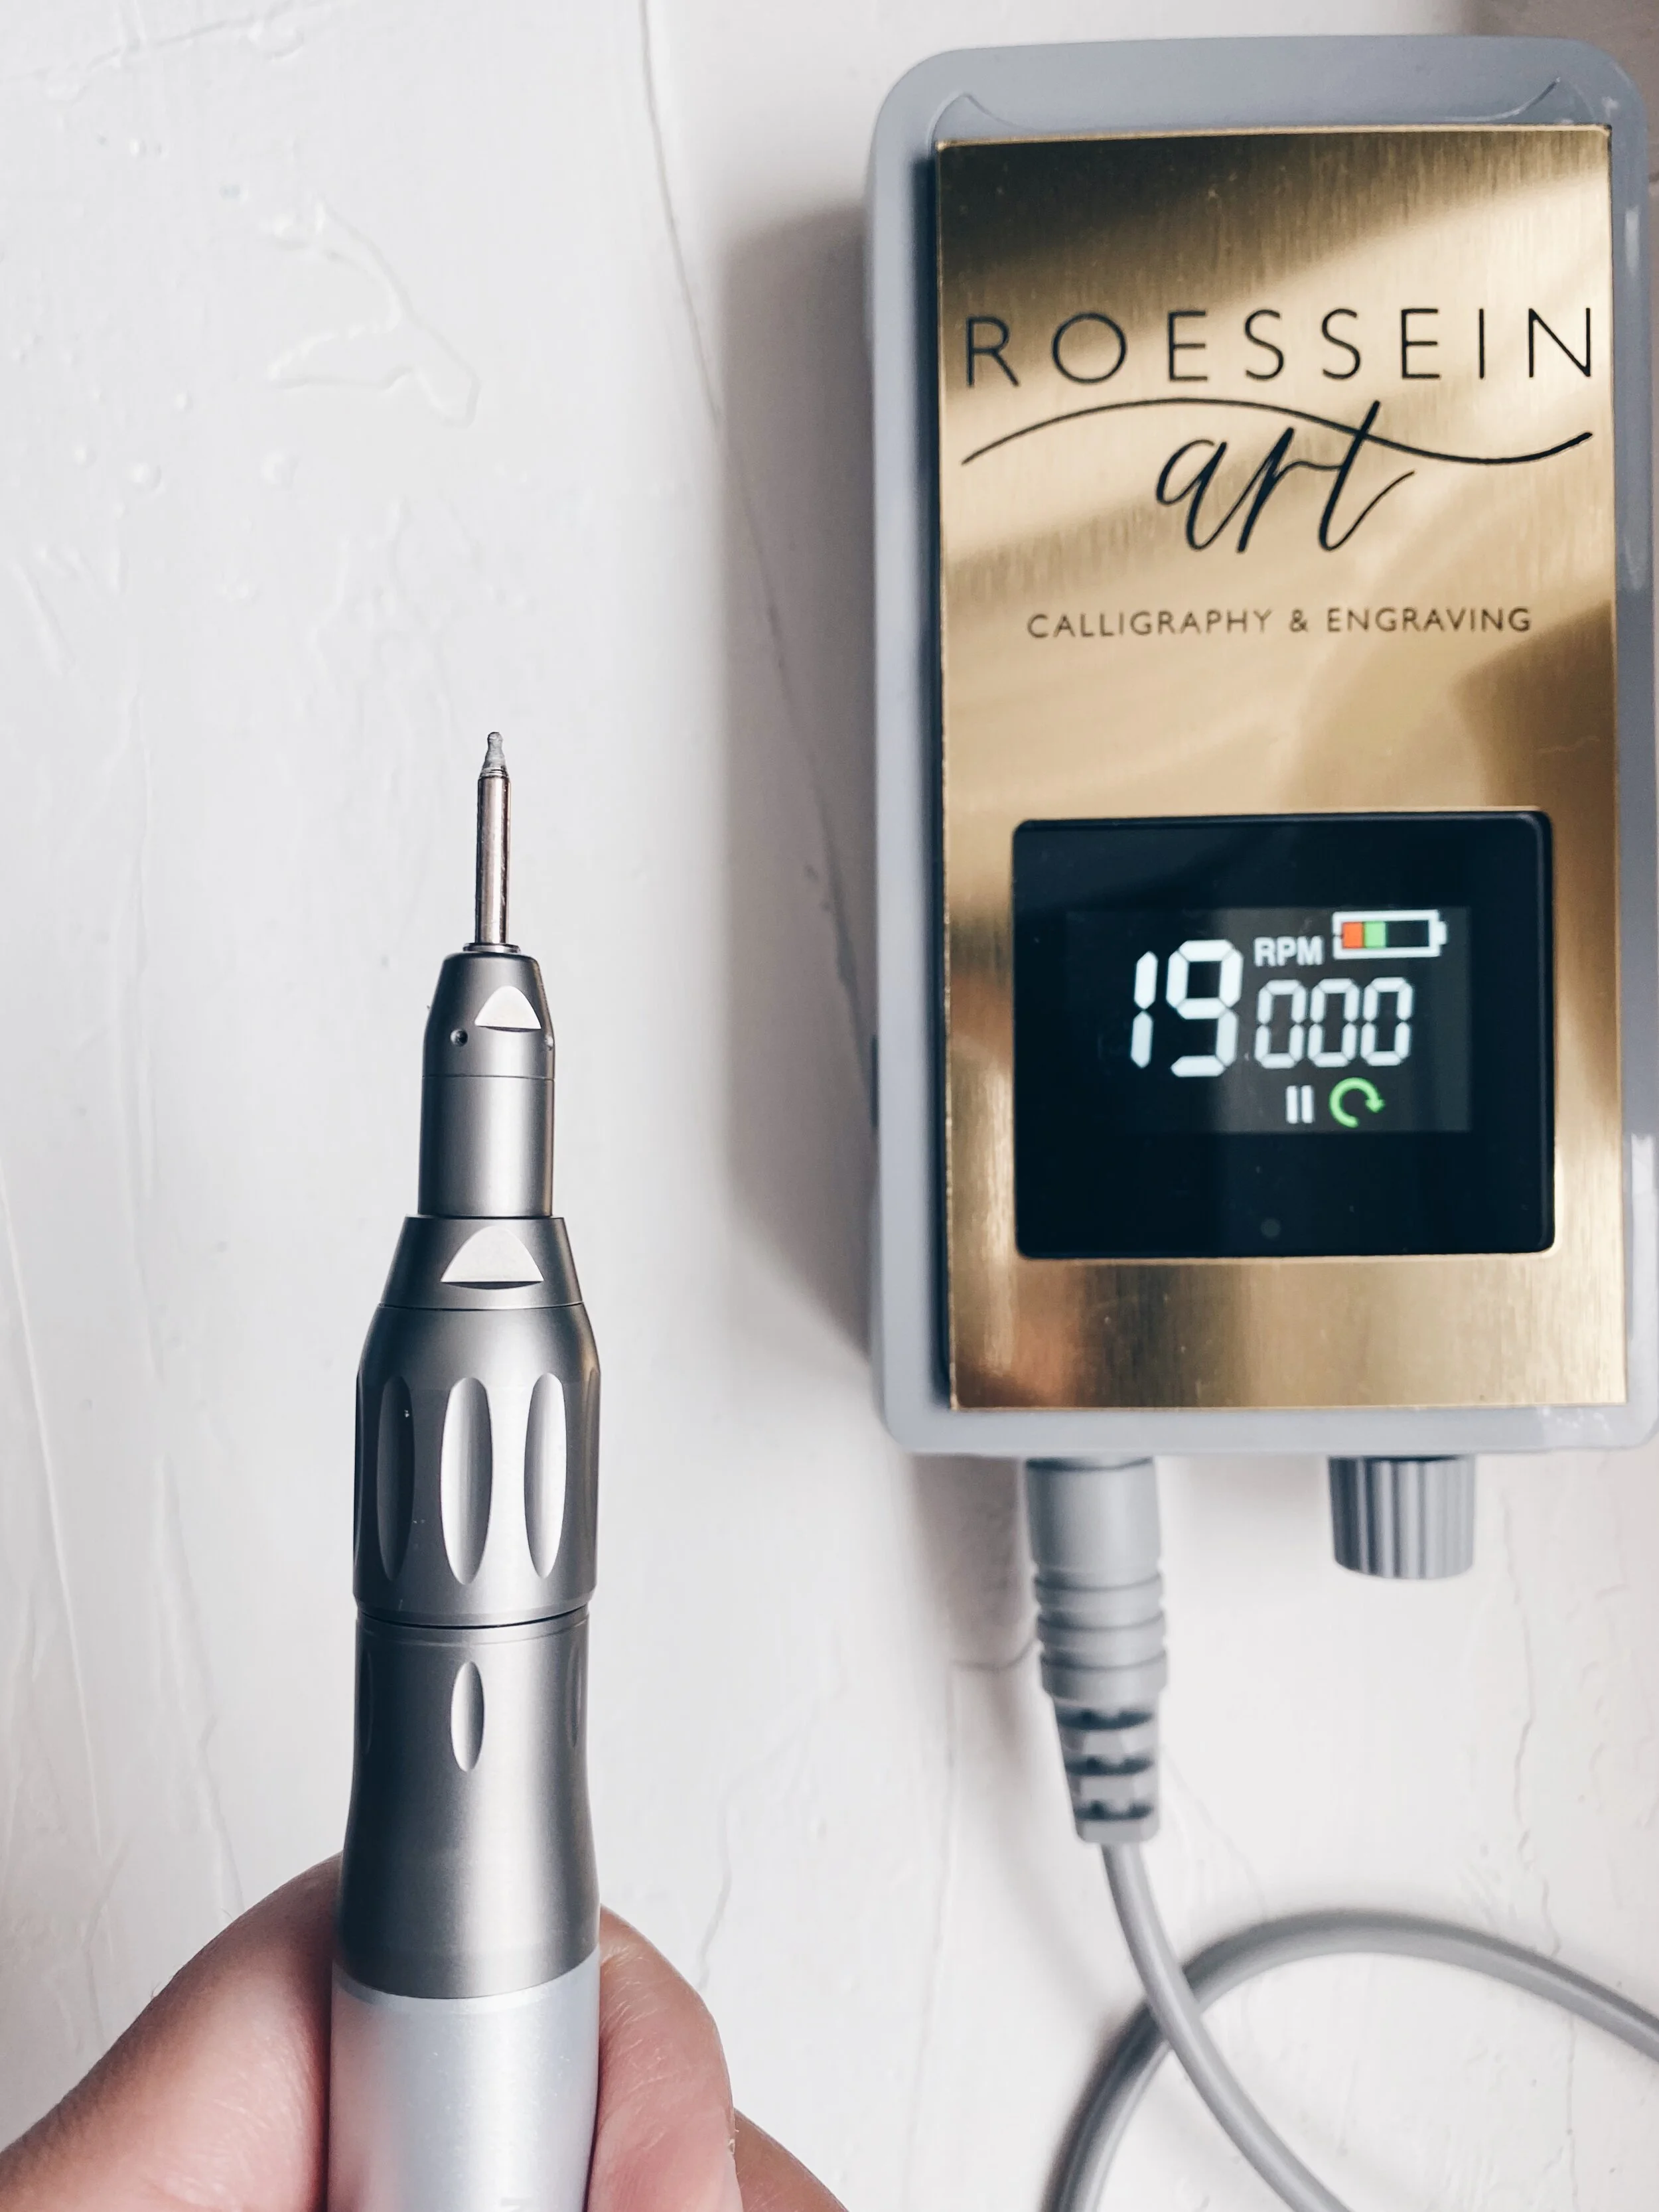
Engraving machine. I used Mystisa 2 with slim handpiece. I like this rotary because it’s a brushless motor, which means I do not feel vibration when I engrave. For this project I used an old 1 mm round diamond bur. Wait, did you say old? Yes…more on this later. Keep reading!

Step 1: Measure the space dimension
I measured the diameter of the compass using Westcott beveled ruler to see the exact space. Then, on my Rhodia dotted paper, I drew the circular space using the drawing compass.

Measure it

Draw it
Step 2: Draw the design on paper
After I drew the circle with a pencil, I inked it with a Fine point Micron 01 pen so whenever I needed to erase my design I didn’t have to redo the circle. Then, I designed the lettering with a pencil. For this project, the client wanted the engraving to say “May this compass guide you to your dreams”. Isn’t that beautiful? It’s a gift for her Godson.
Tip: I like bouncy style of calligraphy but for a tiny space like this, I recommend going with straight style of calligraphy. Bounce calligraphy takes so much more space and it may not be as legible when it’s so small.

Step 3: Draw the design on the surface
Once you’re happy with your design, letter the design on the surface. I used Micron pen on the surface. It’s more visible and doesn’t scratch. Aquarellable pencil is too thick for this surface and it usually scratches on metal surface.
Tip: the lines of the pen may be feathering when you first write. Keep drawing on the surface, then spray with alcohol to remove the manufacturer’s protective layer using paper towel. Using alcohol itself doesn’t always work. Somehow the archival ink from the Micron takes it off. Your line should be smooth after.

Step 4: Engrave
Now comes the most fun part…engraving. Here are my tips for you:
I used 1mm diameter size round diamond bur for small project like this. I used old bur, not a fresh one. Why? Fresh burs are rough and when you engrave against metal it doesn’t look as smooth. How did I find out about this? Remember I mentioned my first engraving live event was to engrave 140 watches (tiny metal surface)? I noticed as I kept engraving, the lines got smoother as the bur was wearing off. Hence, it was easier to control the lines. So don’t throw away your old burs. Keep them for your metal engraving projects.
Set the RPM lower. I set the RPM to 19,000 for all my metal engraving projects. When I go to max, it gets slippery and harder to control the lines…that’s especially hard for a small surface like this.
Don’t dig it. Let the drill does its job engraving. The pressure should be light. If you put too much pressure you may slip and lose control and have wiggly lines. Gently build your heavy downstrokes by repeating the lines over and over with the same light pressure. Make sure you have good lighting so you can see clearly. Remember, there is no room for mistakes.
See video for process. This is a timelapse video. The real time is much slower. Do not rush when you are engraving.
Step 5: Clean up
The last step is pretty straight forward. You can remove your draft lines by spraying it with alcohol so you can see your engraved lines better. If you need to go back and add strokes go ahead. Or maybe you have space for more flourishes. Once you’re happy, take a picture!

If you don’t feel confident enough to engrave directly on the client’s project, I recommend to test on a random, cheap metal material first. You can do it on a metal jar lid. Pretty sure you can find that in your kitchen. Happy engraving!
Not looking to do it yourself? Contact me and let’s chat!
